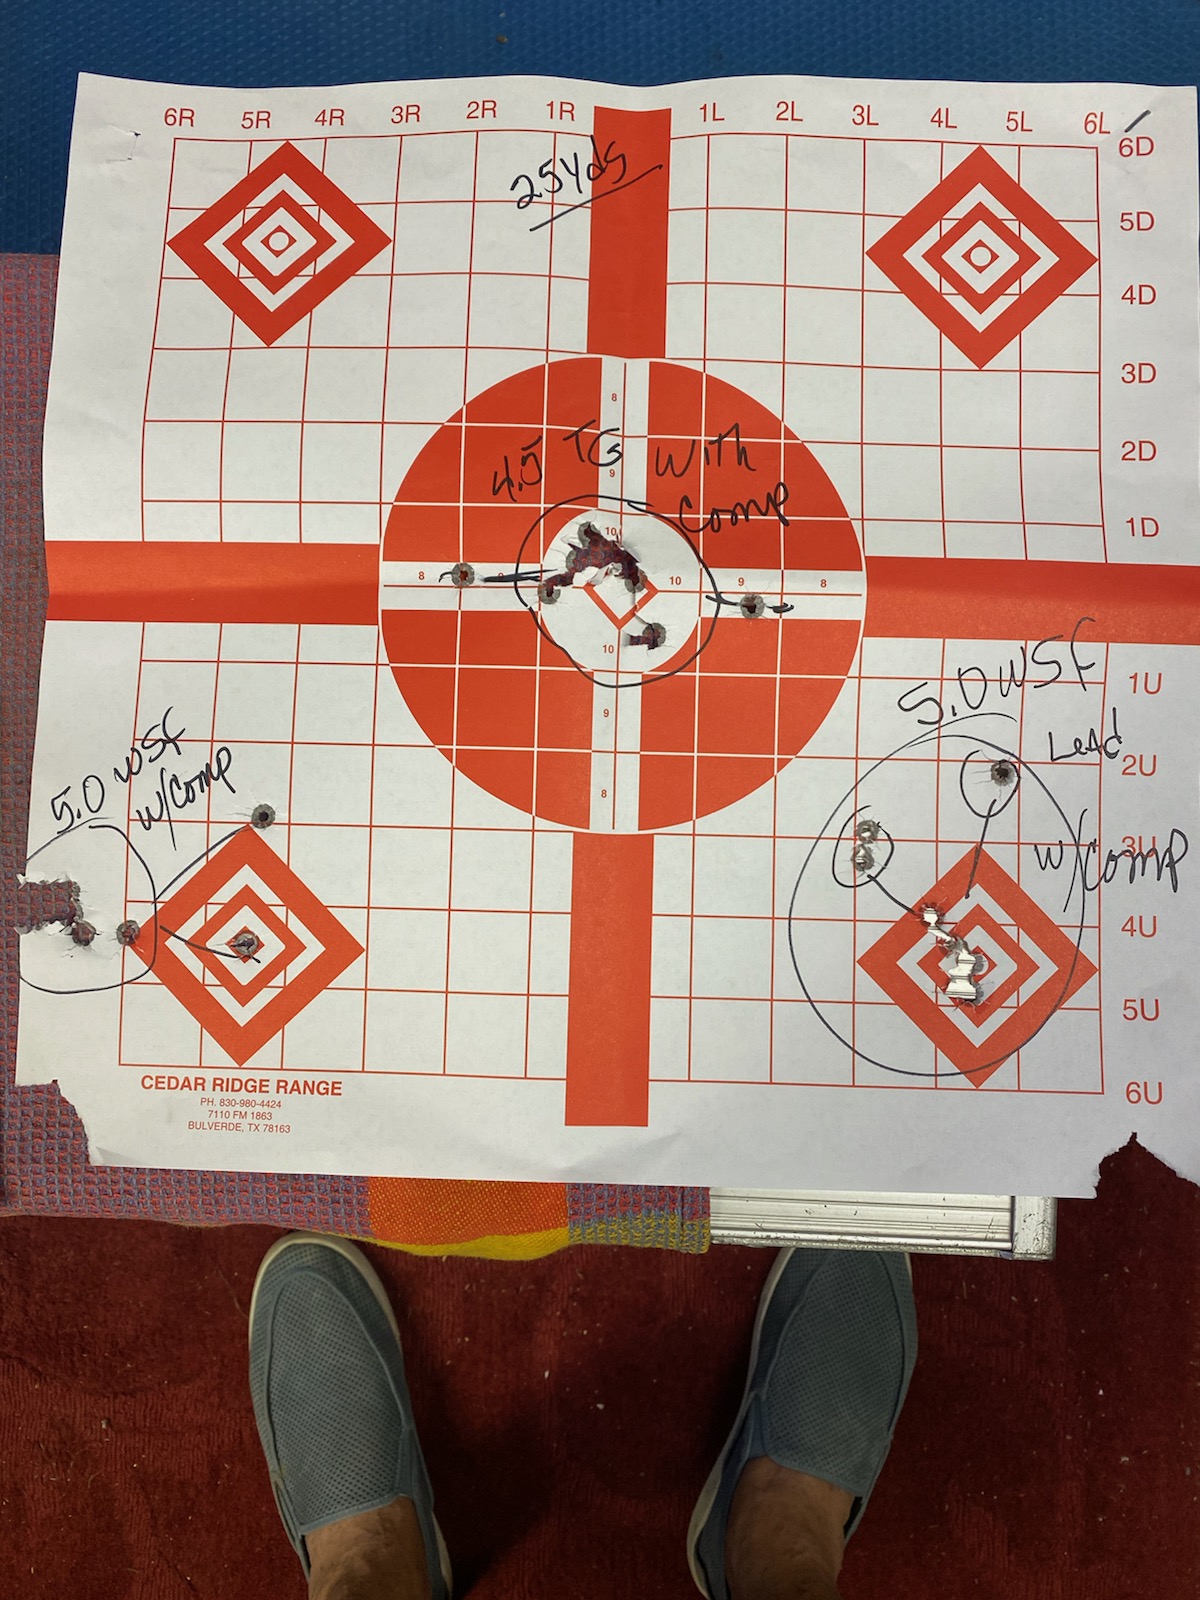
Figure I.
25 yards offhand. S&W 929 with RSC compensator accuracy testing. Center group 2 flyers (left and right).
Here's a collection of tips and procedures that I've learned over my past 40 years of reloading. If you're just starting into reloading I suggest you find (old or new) 2 reloading manuals. Two manuals because you might find errors if using just one manual. I have. And, it's good to have 2 points of view.
Your first objective it to determine what will your loads be used for:
- Target (Bullseye)
- Bowling Pin
- ICORE, USPSA, SASS, IDPA
- Introducing a new shooter to our sport.
- Hunting
- Self Defense
- Other
Each of these purposes will most likely have a different loading requirement.
Also, let's limit this discussion to handgun cartridges. All the purposes for your reloading have an accuracy requirement. More accurate is better. Probably, Target and Hunting have the most accuracy requirements. Let's define accuracy as the bullet hitting where the sights indicated it would.
Next we need to consider how much punch your rounds will deliver. Some shooting sports have a minimum Power Factor as a requirement to score in a match. Power Factor (pf) is defined as bullet mass * velocity / 1000. A 200g bullet traveling at 1000 feet per second (fps) has a pf of 200*1000/1000 = 200. A 100g bullet traveling 800fps has a pf of 100*800/1000= 80pf. This is a measure of momentum or recoil or kick that a shooter will feel when the pistol is shot. A very basic concept that we will get more into as we progress.
Another concept to consider is group size. With all the same loads in your gun, what size group will be shown on the target. The further away you move the larger the group size will become. The better your sights and the younger your eyes the small the groups. The more consistent your ammunition, the small the group size.
Given a bullet, case, hand gun and powder type, as you increase the power amount the group size will expand and contract, but getting smaller and small until you reach max pressure for that combinations. Load up 5 rounds, fire them at the same spot and measure the size of the group. The smaller the spread, the smaller the group size. I measure group size as the maximum spread from outside a bullet hole to outside bullet hole. It's fast and repeatable. You might argue center of hole to center of the other hole is a better measurement, but harder to measure.
The steadier you can hold the pistol when you are testing for accuracy/repeatability, the better results you will get. I sometimes put a 2 power scope on my revolver to perform this type testing. You don't need to do all this, just be consistent in your testing.
If we look at how we treat the cases and bullets as we reload we will see the internal problems that might come up. Clean the cases however you clean your cases. No best way just do what you do. Priming the cases needs to be consistent. I used to deprime and resize my cleaned cases in a press, then prime them as I was watching TV. Check for high primers and deformed primers. Either situation and be a problem later on in this process.
Now for our first critical task let's flare the cases but put in NO powder at this point. Then seat the bullets. Stop right here and pull these freshly seated bullets. You should find NO scars on the bullets. The bullets should look as good as new. If there are any scars, scrapes or other damage to the bullets, FIX IT NOW. You pulled bullets should look like new bullets. If not figure our why and FIX IT. Deformed bullets will not shoot well.
For the next step, same as we just completed but now add a crimp. And then pull the bullets and look for ANY deformation. If you find any FIX IT NOW. We still have no powder and we are just making sure we treat the loading of the bullet as a smooth and gentile process. You can do this test every couple of months to make sure your reloading press hasn't started to do anything harmful to your wonderful bullets.
If all this checks out, then you're ready to add primer, powder and make test ammunition. Starting loads should be as recommended in the loading manuals.
Next step is to test fire the loads. A great tool to have and use is a chronograph. These devices measure the speed of the bullets at the muzzle. Amazon has a Caldwell for $84. You'll save this amount in a year by not testing bad or useless ammunition. Get one, it's a very useful tool and will last your lifetime.
The chronograph will measure speed of the shot in feet per second. But their real value is when you fire say 5 shots the chrono will report all 5, Max fps, Min fps, avg fps, standard deviation of fps and even power factor if you put in bullet weights. We will see how all this fits in to making great ammo.
So here is the groundwork to start reloading your own ammunition. I'll keep revising this as comments come in and look for a next part in a couple of weeks.
Explanation of the target at the start of the article: Juan H is a sponsored shooter for the Revolver Supply Company. He was doing load development on his S&W 929 (8 shot 9MM) using our 145g RN-NLG bullets. The target is at 25 YARDS. That is correct, 25 YARDS. He has a red dot and is shooting free hand. The lines on the target are 1 inch apart. Low corners are tests with 5 grains of WSF powder. The center pattern is 16 shots with 2 flyers caused by the shooter. One to the left and one to the right. The center pattern is less than 2 inch spread using TIte Group. Juan left this for a trip to Europe but when he gets back he'll keep working on accuracy. Not done yet!!!